LEMP is an open-source application stack used to develop and serve web applications on the internet. The abbreviation “LEMP” stands for Linux Operating System, Nginx Web Server (pronounced as engine-x, hence the E in the acronym), MySQL Database, and PHP Language.
This guide covers every step to installing a LEMP stack on an Ubuntu 22.04 server. The first criteria: the Linux Operating system, is met by the Ubuntu. We’ll go over how to set up and execute the remaining components.
Post Contents
Install Nginx Web Server
Nginx is a contemporary and efficient web server used to show web pages to our site visitors.
In a fresh Ubuntu Installation, before installing any application from the Ubuntu’s official repository, we’ll need to refresh the package manager’s DB. Ubuntu uses apt as their package manager so we’ll need to run the following command:
sudo apt-get updateNow we can install nginx by running:
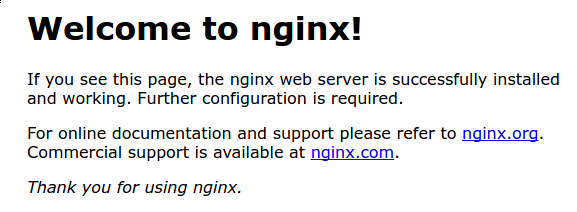
sudo apt install nginxapt will install and configure nginx to serve web pages out of the box. You can check by visiting your server IP address. If it is successfully installed, you’ll see a welcome to nginx landing page.

Note: If your server is running behind the NAT such as Google Cloud, you need to add a firewall entry to allow port 80 and 443 to access the server’s public IP address from your browser.
Install MySQL Database Server
We have our web server running and now we need a database server to store and manage the database for running web applications on our server.
We can install MySQL Server by:
sudo apt install mysql-serverMySQL database server is installed but we need to configure it before start using. To initiate the configuration enter the following command:
mysql_secure_installationThe post configuration prompt will ask you to set root password, then VALIDATE PASSWORD PLUGIN, remove anonymous users, test database and access to it and disallow remote root logins.
I always choose to disable validate password plugin because I can make a strong, unique password for database credentials.
A strong, unique password should have a combination of mixed case letters, numbers and special characters. Although, MySQL does not support all the special characters available. Here are the ones you should avoid:
” ‘ $ , [ ] * ? { } ~ # % \ < > | ^ ;
Here are the ones usually safe to use:
: @ . , / + – ! =
For the rest of the questions, you can press Y, it will remove anonymous users, test database, remote root login, and reload privileges.
By default, MySQL uses Unix socket authentication, which is why it doesn’t require a password for login to the MySQL shell. You might want to use a password instead. To do so, we’ll log in to the MySQL shell and then create a new user with the following command:
sudo mysqlyou’ll see a mysql> prompt, to create a new user with MySQL native authentication plugin which is required by most of the PHP applications, run the following command in the MySQL shell prompt:
CREATE USER 'admin'@'localhost' IDENTIFIED WITH mysql_native_password BY 'password';Now we need to grant all privileges to the admin user.
GRANT ALL PRIVILEGES ON *.* TO 'admin'@'localhost' WITH GRANT OPTION;Finally, the new privileges should be enforced by:
FLUSH PRIVILEGES;Install PHP for processing dynamic web pages.
We’ve installed nginx to serve web pages and MySQL to store information. Now we need to install PHP for processing dynamic web content.
sudo apt install php-fpm php-mysqlThere are some optional PHP extensions often required by many applications or content management system such as WordPress. You can install them by running:
sudo apt install php-curl php-xml php-common php-imagick php-mbstring php-zipConfigure Nginx to serve dynamic web pages
We’ve installed all the necessary components to our server now we’ll need to configure nginx. The default nginx configuration is located at /etc/nginx/sites-available/default. We’ll use nano to edit the default nginx config.
sudo nano /etc/nginx/sites-available/defaultThen we’ll make a necessary adjustment like the config below.
server {
    listen 80;
    server_name example.com www.example.com;
    root /var/www/html;

    index index.php;


    location / {
        try_files $uri $uri/ =404;
    }


    location ~ \.php$ {
        include snippets/fastcgi-php.conf;
        fastcgi_pass unix:/var/run/php/php7.4-fpm.sock;
    }
}
We’re done installing LEMP stack on our Ubuntu 22.04 server. To verify everything works properly, we’ll create a php.info file using nano editor.
sudo nano /var/www/html/info.phpA blank file with nano editor will be opened, paste the following code:
<?php
phpinfo();
Save the file by pressing Ctrl + X, followed by Y , and then Enter. Now we can visit our server’s public IP address to see the results:
http://127.0.0.1/info.phpYou’ll see a web page generated by PHP with your server information like this:

If you see a web page like this, Congratulations! You’ve successfully installed and configured the LEMP stack on your Ubuntu 22.04 server.
We can remove the test php.info file for now:
sudo rm /var/www/html/info.phpConclusion
By following this tutorial you’ve installed and configured a very adaptable platform for serving web content to your visitors. The LEMP stack is now ready to deploy PHP web applications on production environment.